Industrial projects are rarely priced with one simple formula. The final number is built step by step, using real scope, measured quantities, labour logic, material pricing, equipment needs, fabrication costs, installation costs, indirect costs and overheads, and contingency and risk allowances. This is what makes industrial cost estimating different from rough budgeting. A proper estimate is built from first principles so the team can see where the money is going and why.
This industrial construction cost estimating guide is meant to be practical for owners, estimators, contractors, and project managers. It explains how industrial project costs are calculated through a clear step-by-step estimating workflow, starting with scope definition and quantity takeoff, then moving into labour productivity rates, procurement, plant construction cost estimate logic, and final industrial budget control. The goal is not only to reach a price but to create an industrial project budget breakdown that supports better planning, cost forecasting methods, and stronger commercial decisions.
Why Industrial Cost Estimating Is More Complex Than Standard Construction
Industrial cost estimating is more detailed than standard building work because the job is rarely just about concrete, steel, and labour. Industrial projects often include specialist systems, complex mechanical and electrical scopes, hazardous work zones, shutdown planning, commissioning needs, and long procurement timelines. That means the estimate must account for more moving parts, more risk, and more industrial construction pricing factors from the start.
In a normal building project, many costs follow familiar patterns. In industrial work, the cost drivers in industrial projects can change quickly based on plant conditions, process tie-ins, access limits, and project scheduling impact. A small scope change in a live facility can affect labour, equipment, safety controls, and installation sequence all at once. That is why any industrial plant construction cost guide must look deeper than a standard construction estimate.
Common Industrial Cost Drivers
The estimate usually moves up or down based on the real conditions of the site, not just the drawings. Access limits, remote locations, live plant interfaces, safety rules, and labour scarcity all affect labour productivity rates and labour and equipment cost calculations. For example, a job inside an operating plant may need permits, shutdown windows, specialist supervision, and slower work methods, which pushes costs higher even when the physical quantity of work looks small.
Some projects also become more complex because of modularisation, equipment handling, and schedule pressure. Remote work can increase accommodation, transport, and equipment and plant costs. Tight deadlines can reduce productivity and increase shift work or overtime. When estimators review plant project cost drivers, they are not only pricing materials and hours. They are also pricing the conditions that shape how the work can actually be delivered.
Industrial Cost Estimating at a Glance
| Step | What This Step Covers | Why It Matters |
| Step 1 | Define scope, deliverables, and the estimate basis | Sets the pricing rules and reduces confusion |
| Step 2 | Build a work breakdown structure | Organises the estimate into clear cost packages |
| Step 3 | Complete the material takeoff | Measures the work before pricing starts |
| Step 4 | Price direct material costs | Converts quantities into real material values |
| Step 5 | Calculate labour hours and crew rates | Builds the labour side of the estimate |
| Step 6 | Add equipment, plant, fabrication, and installation costs | Captures execution resources beyond labour and materials |
| Step 7 | Price the mechanical, electrical, and instrumentation scope | Applies discipline-specific pricing logic |
| Step 8 | Add procurement, long-lead items, and subcontract packages | Includes third-party and supply-chain-driven costs |
| Step 9 | Include indirect costs, preliminaries, and site overheads | Covers the project support layer |
| Step 10 | Apply risk, contingency, escalation, and tender strategy | Turns the estimate into a bid-ready number |
| Step 11 | Build the final budget breakdown and forecast | Creates a usable control format for the project |
Step 1: Define Scope, Deliverables, and Estimate Basis
This step sets the rules for the whole estimate. Before any numbers are added, the estimator needs to understand what is being built, what must be delivered, and what level of detail the pricing should cover. In a step-by-step industrial cost estimating process, this stage creates the estimate basis, which guides pricing assumptions, scope definition, and industrial budget control from the start.
It also helps the team match the estimate to the job’s purpose. Some estimates are early budget checks, while others are prepared for a tender submission or client approval. That changes how detailed the pricing needs to be. In a strong industrial tender estimating workflow, the estimate basis should explain the source documents used, the design maturity, key assumptions, and any clear limits around what is and is not included.
Review Drawings, Specifications, and BOQs
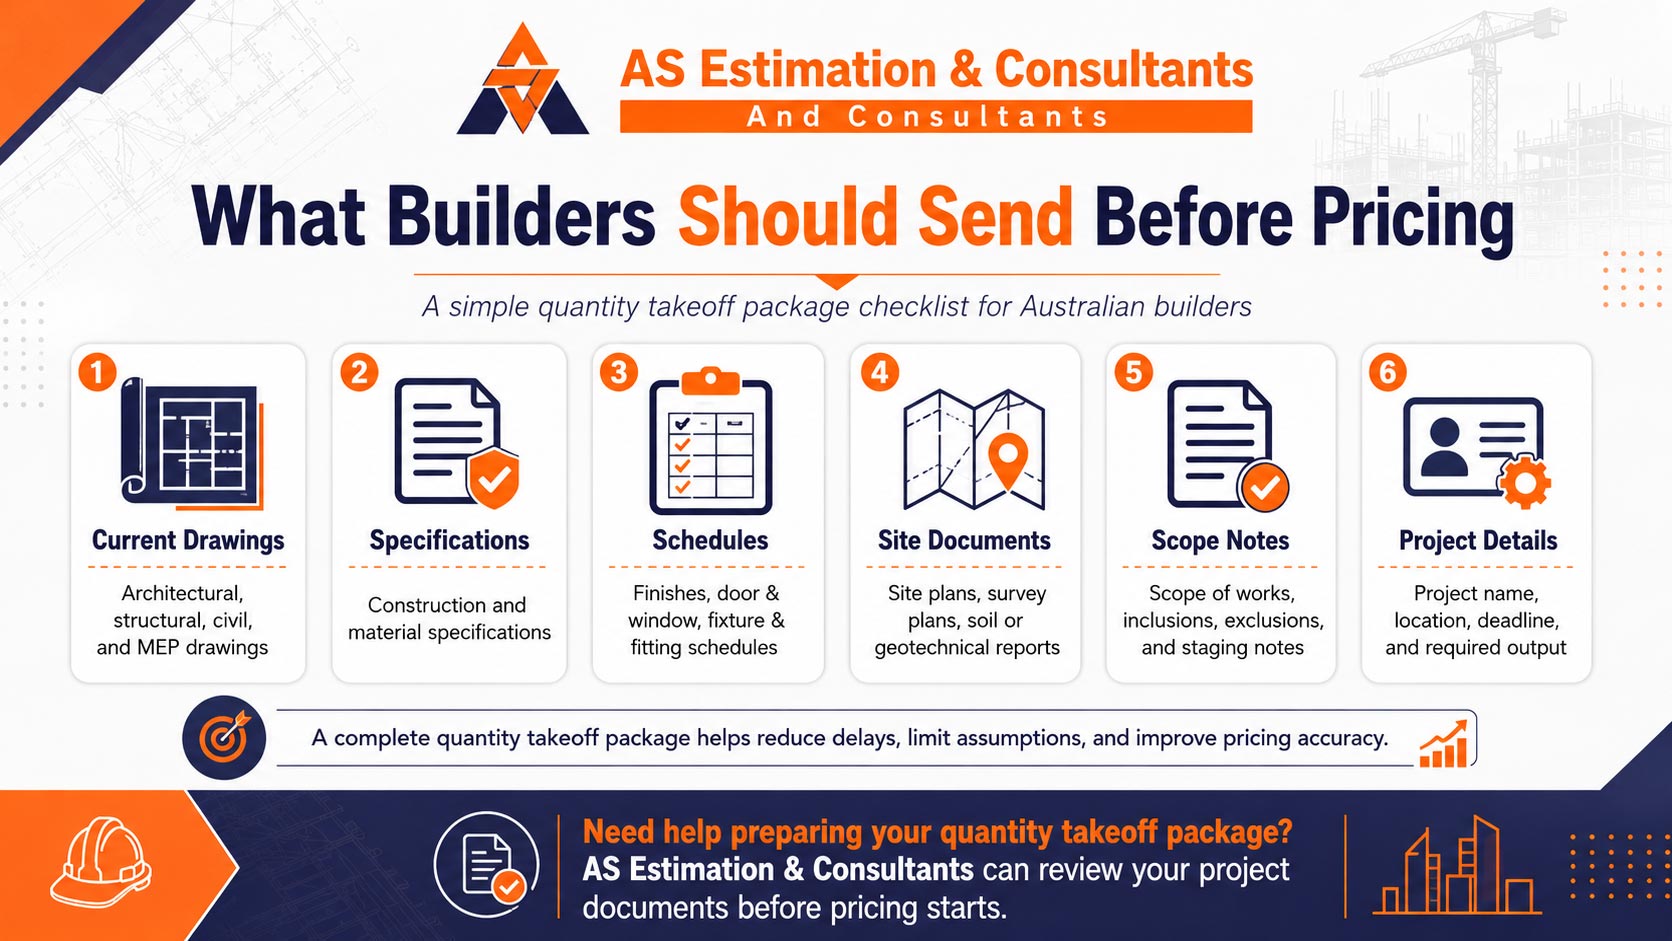
The first part of the scope definition is gathering the right pricing inputs. This includes drawings, technical specifications, BOQs, P&IDs, equipment lists, site information, and any tender clarifications. These estimating documents tell the estimator what materials, systems, and installation work may be required. They also help separate civil, piping, and instrumentation pricing, and mechanical and electrical scope, so nothing important is missed.
Good estimates do not come from guesswork. They come from reading the documents closely and checking whether the information is complete, current, and buildable. In any industrial construction cost estimating guide, this review stage matters because one missing detail in the tender inputs can affect labour, equipment, procurement, and sequencing later. The better the source review, the more reliable the estimate becomes.
Record Assumptions, Exclusions, and Design Gaps
No industrial drawing package is ever perfect. There are often missing details, unclear interfaces, or design gaps that can affect cost. That is why estimators must write down estimate assumptions, create an exclusions list, and clearly flag anything that is not fully defined. This protects estimate accuracy and helps industrial budget control by showing what has been priced and what still carries uncertainty.
This part is also where contingency and risk allowances start to make sense. If some items are unclear, they may need separate pricing, qualification notes, or contingency in industrial estimates. This is one way how contractors price industrial jobs without hiding risk inside random numbers. Clear assumptions and exclusions help avoid disputes later and make the estimate easier to review, compare, and defend.
Step 2: Build a Work Breakdown Structure for the Estimate
Once the scope is clear, the next step is to organise the estimate into logical parts. A Work Breakdown Structure, or WBS for estimating, helps turn a large industrial job into smaller cost packages that are easier to measure, price, review, and control. In a step-by-step industrial estimating process, this makes the estimate structure more practical and less likely to miss scope.
A good WBS also supports industrial budget control because it shows where each cost belongs. Instead of one large number, the team gets a clear industrial project budget breakdown by trade, system, area, or facility. That helps estimators, project managers, and clients understand the job better and spot gaps or overlaps before the final price is locked in.
Group Work by Discipline and Area
The best way to improve takeoff accuracy is to group work in a way that matches how the project will actually be built. That usually means separating civil, structural, mechanical, piping, electrical, instrumentation, and sometimes commissioning support. This kind of discipline-based professional estimating makes it easier to assign the right quantities, labour logic, and pricing method to each scope instead of mixing different work types together.
Area-based estimate logic can also help on larger sites where work conditions change from one zone to another. For example, the mechanical and electrical scope in a new open area may cost less than the same work inside a live plant or tight process unit. The same applies to piping and instrumentation pricing, where access, testing needs, and interfaces can affect cost. Clear grouping supports pricing industrial, mechanical, and electrical works and creates a more useful industrial project budget breakdown.
Step 3: Complete the Industrial Material Takeoff
Before anyone can price the work, they need to measure it properly. That is the purpose of the industrial material takeoff process. It turns drawings and documents into real quantities that can be priced with confidence. In an industrial quantity takeoff, estimators measure concrete, steel, piping, valves, cable, trays, supports, equipment, coatings, and insulation so the estimate is built on facts, not rough guesses.
This step matters because small quantity errors can grow into large budget problems later. A clear industrial measurement workflow helps the team link quantity takeoff to material pricing, labour planning, and piping and instrumentation pricing. In any industrial plant construction cost guide, the takeoff is one of the most important steps because it creates the base for every cost that follows.
Measure Permanent Works and Temporary Requirements
A good takeoff does not stop at the materials that stay in the finished plant. It also needs to capture what is required to build the job safely and properly. That includes temporary supports, temporary power, access systems, consumables, and other short-term resources. This is what makes a full-scope quantity takeoff stronger than a basic list of installed items.
These temporary requirements often sit between direct work and industrial overheads and preliminaries, so they are easy to miss. But they still affect cost in a real way. Preliminaries and site setup, equipment and plant costs, and temporary works takeoff all help shape the final budget. When these items are measured early, the estimate becomes more complete, more realistic, and easier to defend.
Step 4: Price Direct Material Costs
Once the quantities are measured, the next job is to turn them into real material values. This is where material pricing begins. The estimator applies rates to each item and builds a practical procurement cost estimate based on current supply conditions. In industrial work, this does not only mean base item prices. It also includes freight, waste, duties, storage, packaging, and possible escalation.
This step is important because direct materials often form a large part of the final estimate. A weak material cost pricing method can make the whole budget unreliable. Good industrial procurement cost planning helps the team protect industrial budget control by using clear pricing sources and realistic allowances, especially for procurement and long-lead items that may be affected by lead time, shipping risk, or price movement.
Use Supplier Quotes and Current Market Rates
The best material pricing usually comes from a mix of supplier quotes and current market rates. Estimators may use live vendor pricing for major items and reliable catalog rates for smaller or standard materials. This helps create a realistic industrial supply pricing model instead of relying on outdated cost data. It also gives the estimate a stronger link to real buying conditions in the market.
This is also where quote validity and price volatility matter. A rate from one supplier may look low, but it may exclude freight, have a short validity window, or depend on currency changes. That is why a supplier rate check and vendor quote comparison are important parts of how contractors price industrial jobs. They help the estimator compare scope, lead times, and commercial terms so the final number is practical, not just attractive on paper.
Step 5: Calculate Labour Hours, Productivity, and Crew Rates
After material costs are priced, the next step is to calculate the labour effort needed to install the work. This means turning quantities into hours by using labour productivity rates, crew sizes, and expected output levels. In simple terms, the estimator asks how long the work should take, who will do it, and what that labour will cost. This is a key part of the labour and equipment cost calculation.
A good labour hour estimate is not based on guesswork. It is built from productivity-based labour pricing, past job data, site experience, and the actual type of installation work involved. Crew rate estimate logic also matters because different trades carry different wage levels, skill needs, and support requirements. Since labour is one of the biggest cost drivers in industrial projects, even a small change in productivity can move the estimate up or down in a big way.
Adjust for Site Conditions and Scheduling Constraints
Labour rates are never the same on every industrial job because site conditions change how fast people can work. A remote site may reduce productivity because of travel, camp living, and limited support. A live plant may slow progress because of permits, safety rules, and restricted work windows. Night work, bad weather, congestion, and shutdown conditions can all affect labour productivity rates and increase installation costs.
This is why site productivity factors must be reviewed before final labour pricing is set. Schedule-driven labour pricing becomes even more important when the project has tight deadlines or fixed shutdown windows. In those cases, the project scheduling impact can push labour costs higher through overtime, extra supervision, shift work, or lower efficiency. Some of that risk may also need contingency and risk allowances, especially when the work environment is uncertain or highly controlled.
Step 6: Calculate Equipment, Plant, Fabrication, and Installation Costs
After materials and labour are priced, the estimate still needs to capture the execution resources that make the work possible. This includes equipment and plant costs such as cranes, scaffolding, access machines, temporary tools, welding sets, and lifting gear. It also includes fabrication costs and installation costs, which are often major parts of fabrication and installation cost estimating on industrial jobs.
This step matters because industrial work is not only about what gets built, but also about how it gets built. A fabrication cost estimate may depend on workshop time, cutting, welding, testing, and handling. Installation cost pricing depends on site access, lifting methods, crew support, and sequence. Good plant and equipment costing helps the estimator build a more complete picture of labour and equipment cost calculation, instead of focusing only on visible materials.
Separate Shop Fabrication From Field Installation
Shop fabrication and field installation should never be priced as if they are the same type of work. Fabrication done in a controlled workshop is usually faster, easier to supervise, and less exposed to weather, access limits, or plant restrictions. That is why shop fabrication pricing often benefits from better efficiency, cleaner workflows, and more stable output than work done on site.
Field installation cost is different because site conditions change the real cost of doing the work. Transport, unloading, handling, crane access, erection sequence, and project scheduling impact can all slow the job down. A spool that is cheap to fabricate in a shop may still be expensive to install inside a congested plant. In any industrial plant construction cost guide, this separation is important because it gives a more realistic view of both fabrication costs and installation costs.
- Shop Fabrication
This usually covers workshop labour, tools, welding, cutting, fitting, assembly, and quality checks completed before the material reaches the site. The work is more controlled, so productivity is often better, and waste is easier to manage. - Field Installation
This covers delivery to the site, lifting, positioning, alignment, erection, final fit-up, tie-ins, and work completed under real site conditions. It is usually less efficient than shop work and often needs more support equipment and planning.
Step 7: Price Mechanical, Electrical, and Instrumentation Scope
At this stage, the estimate becomes more discipline-specific. Mechanical, electrical, and instrumentation work cannot be priced with one simple method because each package has its own labour pattern, testing needs, procurement path, and installation rules. That is why pricing industrial mechanical and electrical works needs a more careful approach than a basic trade estimate.
A strong MEP industrial estimate looks at how each system is supplied, installed, checked, and handed over. Some items are material-heavy. Others are labour-heavy. Some need shop fabrication, while others depend on site testing, specialist terminations, or commissioning support. This is where piping and instrumentation pricing, fabrication and installation cost estimating, and installation costs all come together in a more practical way.

Mechanical and Piping Pricing
Mechanical and piping work is often one of the largest and most sensitive parts of an industrial estimate. It usually includes equipment setting, pipework, supports, field welds, prefabrication, testing, insulation, and coatings. A proper piping cost estimate must consider both workshop activity and site activity, because the final cost depends on more than just pipe length or fitting count. Labour productivity rates also matter because welding difficulty, access, and testing requirements can change output quickly.
This part of the cost estimate also shows how contractors price industrial jobs in real conditions. Mechanical pricing is affected by weld type, material grade, hydrotesting scope, support complexity, and the balance between shop fabrication and field installation. A welding cost estimate may rise if the work is done in tight spaces, at height, or during shutdown periods. That is why piping and instrumentation pricing needs to reflect both physical quantities and the actual effort needed to install and prove the system.
- Equipment Setting
This covers unloading, positioning, alignment, grouting support, and connection readiness. Heavy or sensitive equipment often needs special lifting plans, tighter tolerances, and more supervision. - Pipework and Welding
This includes pipe fabrication, fit-up, field welds, supports, and tie-ins. Costs can rise when weld counts increase, materials are specialised, or site access is poor. - Testing, Insulation, and Coatings
These items are often missed in weak estimates. Hydrotesting, insulation thickness, and protective coating systems all add labour, materials, and schedule pressure.
Electrical and Instrumentation Pricing
Electrical and instrumentation work has its own pricing logic because it is driven by cable routes, device counts, terminations, panels, and testing links. An electrical estimate is not just based on material quantities. It also depends on cable installation cost, tray routing difficulty, pull lengths, access, and how many connection points must be completed and checked. Instrumentation pricing becomes more detailed when the project includes control devices, loop checks, calibration, and final system integration.
This part of the mechanical and electrical scope often carries more testing and commissioning effort than people expect. A small instrument may seem cheap to buy, but the installation, wiring, termination, and verification work can be much higher than the material cost alone. Labour productivity rates play a big role here because panel work, field cabling, and device terminations all move at different speeds. In any industrial construction cost estimating guide, E&I pricing must reflect both installation effort and the quality checks needed before startup.
- Cabling and Tray Routing
Costs depend on route length, bends, congestion, support spacing, and how difficult the pull is. Long or crowded cable runs usually increase labour time. - Panels, Instruments, and Terminations
This includes mounting, wiring, terminations, device connection, and checking. Even simple-looking instruments can take time when access is limited or standards are strict. - Testing and Commissioning Links
Loop checks, continuity tests, calibration, and startup support can add meaningful cost. These items are essential because the system must not only be installed, but also proven to work safely and correctly.
Step 8: Add Procurement, Long-Lead Items, and Subcontract Packages
Not every industrial cost sits inside direct labour or direct materials. Some costs come through suppliers, specialist vendors, and subcontractors who handle parts of the work outside the main site team. That is why Step 8 focuses on procurement and long-lead items, vendor package costing, subcontract pricing, freight, storage, expediting, and procurement admin as part of the full procurement estimate.
This step matters because third-party costs can affect both price and schedule. A delayed vendor package, a missed freight allowance, or a weak subcontract pricing review can push the project over budget later. Good industrial procurement cost planning helps estimators include real buying conditions, not just base rates. In a strong industrial tender estimating workflow, these items are checked early so industrial budget control stays practical and realistic.
Compare Vendor and Subcontractor Quotes
A good estimate does not simply pick the lowest quote and move on. It compares each offer carefully to see what is really included, what has been excluded, and how the terms may affect delivery. This is where subcontractor comparison becomes important. A low price may look attractive at first, but if the scope is incomplete, the lead time is too long, or hidden extras are buried in the fine print, the real project cost can end up much higher.
This is why quote leveling, vendor comparison, and subcontractor review are such important parts of how contractors price industrial jobs. Estimators need to check scope compliance, procurement and long-lead items, delivery windows, payment terms, freight limits, storage needs, and any special commercial conditions. Good industrial procurement cost planning is not only about finding a number. It is about finding a realistic number that can actually support delivery without creating budget trouble later.
- Scope Compliance
Check whether the vendor or subcontractor priced the full required scope, including testing, documentation, delivery, and support items. - Lead Times and Delivery Risk
Long lead items can affect the schedule and working sequence. A realistic quote must match the project timeline, not just the shopping list. - Commercial Terms and Hidden Extras
Review exclusions, freight limits, storage, warranty conditions, and any extra charges that may not be obvious in the first price.
Step 9: Include Indirect Costs, Preliminaries, and Site Overheads
Not every project cost is tied to a measured item like steel, pipe, or cable. Industrial jobs also need a support layer that keeps the work running day to day. This includes site office costs, supervision, management, HSE, QA/QC, temporary facilities, insurances, and utilities. When estimating indirect costs in industrial construction, these items are essential because the project cannot run safely or efficiently without them.
This part of the estimate helps build a more complete site overhead calculation. It also supports industrial budget control because it shows the real cost of delivering the work, not just installing it. Good preliminary pricing captures the setup and support needed around the job so the final estimate reflects actual project conditions. That is why industrial overheads and preliminaries are a standard part of serious industrial estimating, not an optional extra.
Separate Project Overheads From Corporate Overheads
A common mistake in indirect cost pricing is mixing site-based support costs with company-wide business costs. Project overheads are the costs directly linked to delivering that specific job, such as site offices, temporary power, supervision, safety staff, and local management. These belong inside the project estimate because they are needed on site and rise or fall depending on project duration, size, and working conditions.
Company overhead allocation is different. These are broader business costs, such as head office support, general admin, finance teams, and ongoing company operations that are not tied to one project alone. Keeping this split clear makes preliminaries and site setup easier to understand and avoids confusion in estimating indirect costs in industrial construction. It also helps the team explain the price more clearly, protect margins, and keep industrial overheads and preliminaries properly structured.
- Project Overheads
These are job-specific support costs needed to run the site, such as supervision, HSE, temporary facilities, and utilities. - Corporate Overheads
These are wider business costs recovered across projects, such as office salaries, systems, accounting, and general administration.
Step 10: Apply Risk, Contingency, Escalation, and Tender Strategy
By this stage, most of the core project costs have already been built. Now the estimate needs to be shaped into a bid-ready number. This is where the estimator adds risk allowances, escalation allowance, margin, and pricing decisions that reflect uncertainty, market conditions, and tender pressure. In simple terms, this step moves the estimate from a technical cost build-up to a number that can actually be submitted.
This part matters because no industrial estimate is perfect. Prices can shift, scope can change, and site conditions can create extra costs later. That is why contingency in industrial estimates and industrial project forecasting methods is so important. They help the team deal with inflation, estimate uncertainty, and bid positioning in a controlled way. It also shows how contractors price industrial jobs when they need to balance competitiveness with commercial protection.
When to Use Contingency vs Risk Allowances
Contingency and risk allowances are often treated as the same thing, but they are not exactly the same. Contingency is usually applied for general uncertainty in the estimate, especially when the design is still developing or the job is not fully defined. Risk allowances are more targeted and are often linked to known concerns, such as difficult access, live plant work, or uncertain productivity. This is why the difference between contingency and risk should be clear in any serious estimate.
The right choice depends a lot on estimate maturity. If the drawings are early and many details are still open, the estimate may need a broader uncertainty allowance. If the scope is better defined but some known risks remain, then a more focused risk allowance may be the better tool. Good cost forecasting methods help the team decide how much protection is needed and where it should sit. That makes contingency and risk allowances more transparent, more logical, and easier to defend during review.
- Contingency
This is usually used for general uncertainty in the estimate. It covers the unknowns that come from incomplete design, limited detail, or early-stage pricing. - Risk Allowances
These are used for more specific risks that the team already knows about, such as shutdown limits, access issues, labour pressure, or schedule constraints. - Tender Strategy
This is where pricing logic meets market reality. The team may adjust margin, competitiveness, and bid strategy depending on client expectations, market pressure, and the chance of winning the job.
Step 11: Build the Final Budget Breakdown and Forecast
Once all costs have been priced, the estimate needs to be presented in a format that people can actually use. This is where the final industrial budget is built. The goal is not just to show one total number, but to create a clear industrial project budget breakdown with direct costs, indirect costs, procurement, contingency, and key discipline totals. That makes the estimate easier to review, approve, and manage.
This step is also important for industrial budget control after the project begins. A good project cost summary helps the team see where money is planned to be spent and where future pressure may appear. It also supports industrial project forecasting methods by creating a structure for updates later. In simple terms, this is the point where the estimate stops being just a pricing document and becomes a control tool for the job.

Turn the Estimate Into a Cost Control Baseline
A strong estimate should still be useful after the contract is awarded. That is why it needs to be converted into a cost control baseline. This means setting up budget codes, splitting costs into logical tracking groups, and aligning the estimate with how the project team will report actual spending. In a proper post-award budget setup, the estimate becomes the starting point for tracking performance instead of being left behind once the bid is submitted.
This also supports better cost forecasting methods during delivery. As the project moves forward, actual costs can be compared against the forecast baseline, and revisions can be made when conditions change. At a high level, this is where earned value thinking can also connect to the budget, because progress and spending can be reviewed together. A clear cost control baseline keeps the step-by-step estimating workflow useful long after pricing is finished.
- Budget Codes
These help break the estimate into trackable parts so actual spending can be recorded in the right place. - Tracking Actuals
This means comparing real project spending against the original budget to spot cost pressure early. - Forecast Revisions
As the project changes, the team updates the forecast to reflect the expected final cost, not just the original estimate. - Control Baseline
This is the approved budget structure used to manage costs during project delivery.
Common Mistakes That Distort Industrial Project Cost Estimates
Even a well-structured estimate can go wrong if a few key items are missed or priced badly. Most cost estimate errors do not happen because someone forgot how to use a spreadsheet. They happen because the real job conditions were not understood properly. Weak scope definition, unrealistic labour productivity rates, poor subcontractor comparison, and missing project scheduling impact are some of the most common reasons industrial estimates become inaccurate.
These estimating mistakes often lead to underpriced industrial bids, budget stress, and avoidable disputes later. In industrial work, small gaps can grow quickly because many cost drivers in industrial projects are connected. If the schedule tightens, labour costs may rise. If a quote is incomplete, procurement costs may change. If indirect support is missed, estimating indirect costs in industrial construction becomes too light. That is why these mistakes matter so much.
- Missing Scope
When part of the work is not included in the estimate, the final price looks lower than it should. This often happens when the scope definition is weak or the tender documents are not reviewed carefully. - Wrong Productivity Rates
Labour productivity rates should match the actual site conditions, not ideal conditions. If access is poor, the site is live, or the work is remote, labour output may drop, and costs can rise fast. - Low Contingency
Some estimates look competitive only because the allowance for uncertainty is too small. If the design is still developing or site conditions are not fully clear, a low contingency can leave the budget exposed. - Poor Quote Review
A supplier or subcontractor price should never be accepted at face value. Without proper subcontractor comparison, exclusions, hidden extras, and weak delivery terms can be missed. - No Schedule Impact Pricing
Project scheduling impact is often underestimated. Tight deadlines, shutdown windows, overtime, and shift work can all change labour, plant, and supervision costs in a major way. - Ignoring Indirect Costs
Site offices, supervision, temporary facilities, HSE, and QA support are easy to overlook. But if these items are missed, estimating indirect costs in industrial construction becomes incomplete, and the budget loses accuracy.
FAQs
Industrial project costs are calculated by building the estimate step by step. The estimator starts with scope definition, then measures quantities, prices materials, calculates labour hours, adds equipment and plant costs, includes procurement and subcontract packages, and then adds indirect costs, contingency, and risk allowances. The final number is not just a guess. It is built from many cost layers that reflect how the project will actually be delivered.
Industrial cost estimating is more complex than normal construction because industrial jobs usually involve specialist systems, live plant conditions, shutdown windows, hazardous areas, strict quality rules, and long-lead procurement. These factors affect labour productivity rates, installation methods, equipment needs, and schedule pressure. That is why industrial estimates need more detail and more careful planning than standard building estimates.
An industrial project cost estimate usually includes direct materials, labour, equipment, fabrication, installation, procurement, subcontractor costs, indirect costs, site overheads, preliminaries, contingency, and risk allowances. In many cases, it also includes escalation, logistics, storage, and schedule-related cost impacts. A good estimate covers both the physical work and the support needed to complete the project properly.
A quantity takeoff in industrial estimating is the process of measuring all the work items before they are priced. This may include concrete, steel, piping, valves, cable, trays, instruments, coatings, insulation, and temporary requirements. The purpose of the takeoff is to create a solid base for pricing so the estimate is built on measured quantities instead of rough assumptions.
Labour costs change so much in industrial projects because the work environment can greatly affect productivity. A remote location, a live operating plant, limited access, bad weather, shutdown work, or night shifts can all slow crews down. When labour productivity rates drop, labour hours increase, and that pushes total project cost higher even if the material quantities stay the same.
Final Takeaway: Industrial Costs Are Built Layer by Layer
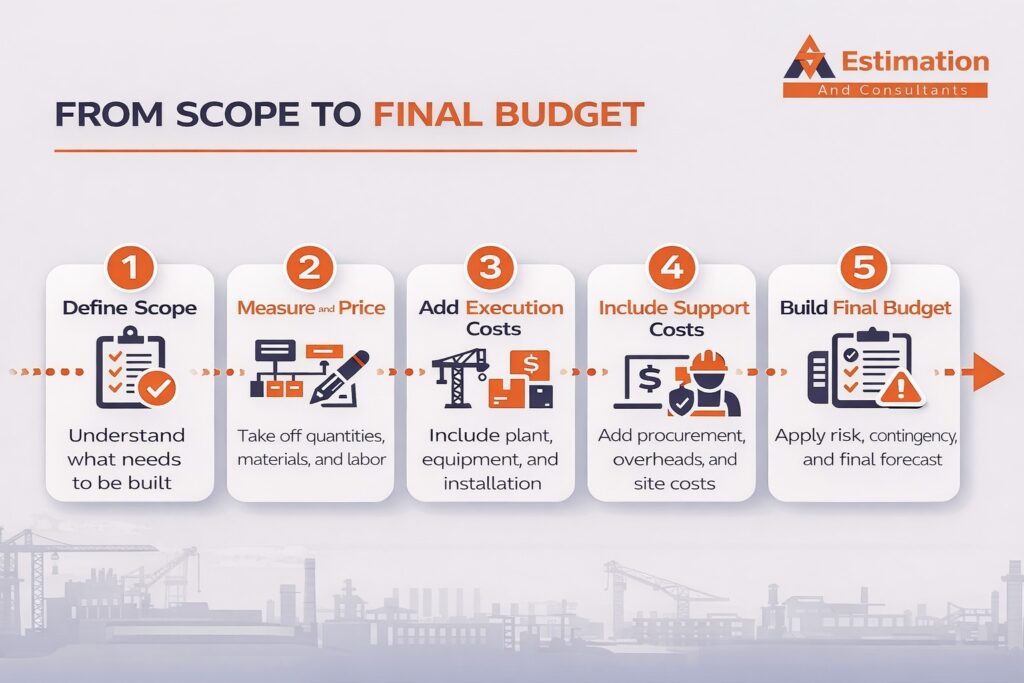
Industrial cost estimating works best when it follows a clear structure. It is not guesswork, and it is not just one big number made at the end of a tender. It is a step-by-step industrial estimating process where each layer builds on the one before it. The team starts with scope, then measures quantities, prices, and direct costs, adds indirect costs, applies risk, and finishes with a usable industrial project budget breakdown.
That is the real answer to how industrial project costs are calculated. Each cost layer has its own purpose, and each one helps improve industrial budget control. When the process is done properly, the estimate becomes more than a price. It becomes a planning tool, a review tool, and a control tool for the whole project. In simple words, a strong industrial estimating recap always comes back to the same idea: better inputs, better structure, and better decisions lead to a better industrial cost summary.